Tuesday, December 21, 2010

An Old Favorite

Chocolate sheet cake.....I remember getting so excited whenever my mother made that dessert. I'd come home from school to find a large pan all set up, chocolate glistening and sprinkled with pecans, mmmmm! As I sat at our breakfast room table finishing up my homework, I would glaze longingly for a small slice. Sometimes I'd even walk over the try and find the pecan bit that looked like it might fall off. Surely no one would miss a small piece of pecan and a little scoop of icing? Fortunately for the dessert, my mom was always present to shoo me away before I did too much damage, and she always saved me a slice or two for later.

Below is the recipe with the original chocolate icing, however, if you'd like an alternate ending, I've also made the cake with a browned butter frosting. The browned butter requires chilling so be sure to add that to your time schedule. Enjoy!
Chocolate Sheet Cake:
2 cups sugar
2 cups flour
1/2 cup margarine
1/2 cup shortening
5 Tbsp cocoa powder
1 cup leftover coffee (or water)
1/2 cup buttermilk
2 eggs
1 tsp baking soda
1 tsp cinnamon
1 tsp vanilla
-Sift together flour and sugar. In a large saucepan, combine margarine, shortening, cocoa, and coffee. Bring to a boil then remove from heat.
-Sift together flour and sugar into a mixing bowl. Beat in hot mixture and add remaining ingredients. Stir until just incorporated.
-Pour batter into a greased 15x10 baking pan and bake for 20 minutes at 400 degrees.

While cake is baking prepare chocolate frosting...


Chocolate Icing:
1/2 cup margarine
5 Tbsp cocoa powder
6 Tbsp milk
1 12 oz box of powdered sugar
2 tsp vanilla
2 cups chopped pecans
-Bring margarine, cocoa powder, and milk to a boil. Add to a mixing bowl with remaining ingredients and beat until fluffy.
-Pour frosting over hot cake and sprinkle with pecans.

Browned Butter Frosting:
1 cup butter
2/3 cup brown sugar
3 cups powdered sugar
1 cup heavy whipping cream
3 tsp vanilla
-Heat butter in a small saucepan for approx 8-10 minutes, stirring constantly. Butter will turn golden brown then remove from heat. Cover and chill butter for an hour.
-Whip butter, brown sugar and cream in a mixer until fluffy. Add vanilla and beat in powdered sugar cup by cup until you reach desired taste and consistency. (I've added less than 3 cups before, and sometimes more)

Christmas Truffles

Things are busy busy busy here with all my Christmas baking. Here is a sneak peak:

Listing Clockwise:

-White chocolate ginger spice truffles rolled in pecans

-Dark chocolate coated Fleur de sel caramels (with a little gold dust)

-Peanut butter and apricot jam chocolate cups

-Cocoa dusted Earl Grey milk chocolates with craisins

Sunday, December 19, 2010

Man Food

Its well into the Christmas season and we've definitely broken in our kitchen! A couple of weeks ago, Seth prepared me that we would be hosting a Monday Night Football party for the guys in our new church. He was VERY excited and sent out a powerpoint email with google picture directions as well as the detailed menu for the night. Seth requested "man food" that should not include a fruit or vegetable of any sort, although the guys didn't seem to mind the mexi-corn cheese dip at all! But the favored of all foods that evening was the dish that combined sweet, smokey, and salty.... bacon caramel popcorn. Here is the recipe:
Bacon Caramel Popcorn
1/2 cup popcorn kernels
1 Tbsp vegetable oil
5 slices of cooked bacon, chopped (approx 6oz)
3/4 cup whole cashews
1 1/2 cups sugar
1/4 cup water
2 Tbsp light corn syrup
1/2 cup heavy whipping cream
2 tsp Kosher salt
1/2 tsp chipotle powder
1.) Heat popcorn and oil in a large covered pot until kernels start to pop. Hold lid and pot handle (with oven mits) and shake the pot until the kernels stop popping. Pour popcorn into a very large bowl and add bacon and cashews.

2.) Line a baking sheet with parchment paper and set aside. Preheat oven to 350 degrees.

3.) Combine sugar, water, and corn syrup in a bowl and stir to combine. Cook over medium heat, without stirring, until the caramel turns deep amber. Remove from heat and immediately add the cream, salt, and chipotle (the mixture will bubble up). Quickly pour over popcorn mixture, and stir.

4.) Pour caramel popcorn into the baking sheet and spread out. Bake until the caramel is shiny (approx 10-20 minutes). Let cool completely then break up popcorn into handful sized chunks.

Saturday, November 27, 2010

Our Thanksgiving

What a wonderful holiday to give thanks with family and friends! This year Seth and I were able to celebrate with my family and here is a sampling of our menu:
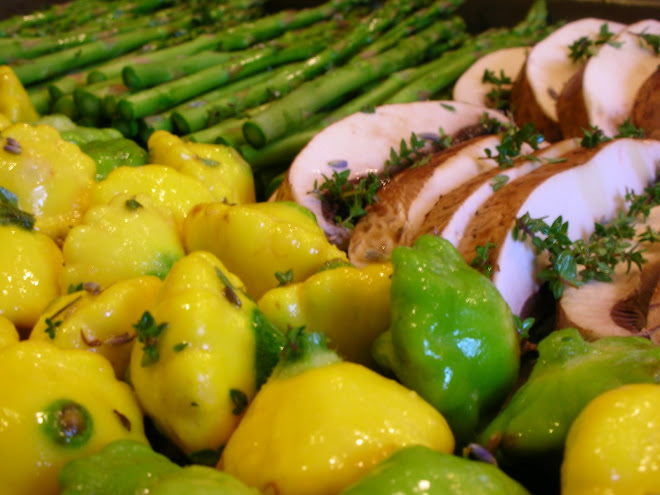
Herb butter turkey stuffed with apples, onions, and cinnamon My grandmother's traditional cornbread dressing Sweet potato rounds roasted in garlic, sage, and maple syrupBaby squash and zucchiniRoasted fig and pear salad with Parmesan shavings, a crumbly picada of toasted garlic walnuts and a pomegranate vinaigretteCranberry orange sauce with crystallized ginger And topped with my mother's fabulous giblet gravy!A wonderful California red blendMmmm Turkey

Pecan pie with flaky crust and my random spun sugar garnish

Hope everyone had a blessed Thanksgiving... now its time to start cooking for Christmas!

Sunday, November 21, 2010

Bourbon, Bacon and Apple Cider

This past Friday was Seth's squadron Thanksgiving lunch, and I was signed up to make gravy for 50 people. As I was cooking, I realized that making gravy can be a slight hassle. In order to make it flavorful, you have to use the turkey dripping after the turkey is finished cooking. That leaves one juicy turkey sitting on the counter, and many hungry people all vying for a taste test of the bird while you are whisking away trying to get that gravy just right. My first gravy was too thick, mainly because I was distracted baking the turkey and side items. Gravy experience number two resulted in a thin gravy because the food was getting cold and my patient roommates were getting hungry. If I didn't have to wait on those drippings and was able to start the gravy sooner, I wouldn't have a problem with gravy!
Seth's lunch was a chance to experiment since I wasn't making a turkey. Bacon makes some great drippings and Seth enjoyed eating the leftovers. The smokiness of the bourbon really pairs well with the slight tang of apple cider. This recipe serves 10 people, or 8 if you're serving those who pour gravy over the entire plate.

Bourbon Bacon Gravy
1/2 lb bacon
Up to 1/2 cup butter, unsalted
1/2 cup flour
1/2 cup Kentucky Bourbon
4 cups chicken stock
1 cup apple cider (unfiltered is best)
1 Tbsp onion juice (or 1 tsp onion powder)
Salt and Pepper to taste


-Fry up the bacon in a large cast iron skillet or dutch oven, reserving all bacon fat and drippings. Eat the bacon or make a BLT. If bacon fat measure less than 1/2 cup, then measure out butter to a total of 1/2 cup of fat.

-Heat the butter and bacon drippings and slowly add the flour, whisking constantly to make a roux.* Cook slowly on medium heat being careful not to burn. Once it gets to a peanut butter or chocolate color slowly add bourbon. Pour in remaining liquids and stir. Bring to a soft boil for 30 minutes. Add seasonings to taste. Simmer until dinner is ready!

-If gravy isn't thickened to your taste, make a paste of 1 tbsp cornstarch and a tbsp of liquid (I used leftover hot coffee) and stir into gravy.
*I prefer a darker gravy so I need my roux to be the color of chocolate in order to get that nutty flavor! It is really easy to burn a dark roux, so I cook it until it gets to a milk chocolate color and then turn off the heat. The residual heat continues to cook the roux to the perfect dark chocolate color. This requires A LOT of whisking and patience but it pays off. I stood over the stove whisking for almost an hour, however I was making large batch roux. The time depends on how dark you like your roux and gravy.

I apologize for the bland looking picture. There were some hungry sailors waiting for lunch!

Thursday, November 18, 2010

Thankful!

We have so much to be thankful for and because Thanksgiving is only a week away, I thought I'd share why I love my new kitchen...
Yes, that is a garbage disposal, and if you've ever lived on Whidbey Island you know why I am thankful for this simple appliance! Sometimes I grind up a lemon just to smell that citrus zing in my sink.

Icemaker! We're finally back to loading our water glasses with tons of ice and I can throw away those plastic ice molds.


Ahhhh and we're cooking with gas!

And this is the view from my kitchen. I can actually see the Chesapeake glistening through the leaves while I wash dishes. We are so blessed!

Wednesday, October 20, 2010

Almost Ready...

After a month and a half of moving, I think we have some semblance of order in the Harbin house. I'm not quite ready to start blogging again, however I thought I'd share a picture from the local farmers in Southern Maryland.


Yes, a giant cornucopia! See you soon!